


Thermal imaging cameras are probably the most innovative technology our industry has experienced in recent decades. Where it was very expensive in the beginning, it is getting cheaper and cheaper while the quality is still skyrocketing. You don’t pay more for a top quality thermal image than for a rifle scope from the top segment. The latter often become more expensive, although in my opinion the innovations and improvements are marginal.
More and more hunters are therefore finding their way to this new and handy tool that can be an asset for many hunters in correctly monitoring and selecting the correct shot, but can also contribute to the safety of all. Nevertheless, it will probably remain difficult for many hunters to see the forest for the trees and to select the right thermal image. As with rifle scopes, more expensive is therefore not always more suitable.
At the request of hunting.be and Lahoux Optics , I am writing this article for you. I hope that this may be an objective guideline that will concisely provide you with all the information you need to pay attention to when purchasing. For the sake of completeness, I would like to mention that I myself work for a wholesaler in hunting and shooting sports where we distribute Lahoux Optics in the Benelux. Nevertheless, I dare to say that in this article I am as objective as possible, whereby the best advice I can give you is that it is best to test and compare as many devices as possible under the same conditions.
Legal
The legal framework in Belgium only allows thermal imaging cameras that are held in the hand and where there is no possibility that the same thermal imaging camera can be positioned on your weapon in order to use it as a rifle scope. That is the legal framework within which we have to play, otherwise you run a great risk because the possession of amplifying rifle scopes is prohibited, cf. The silencer that can be placed on a .22 LR for example.
Use
From experience, the first question you should ask someone when choosing the right thermal image is the following: what do you want to use this tool for? Ask yourself this before reading on. Is it mainly about seeing if there is something there? Or do you want to be able to determine exactly what it is? Is it about small game or also big game. Do you mainly want to watch at short distances or do you have a vast hunting field where you like to look hundreds of meters away? Is it mainly for observation or really a tool that you want to use while sitting down? Depending on the answers, you end up with a different device.
Action
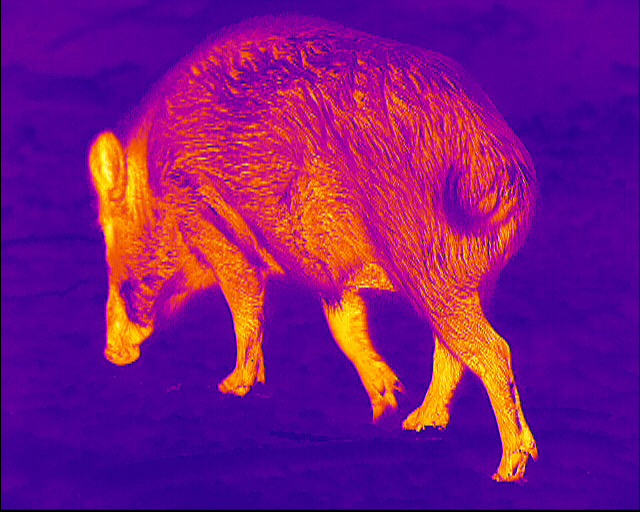
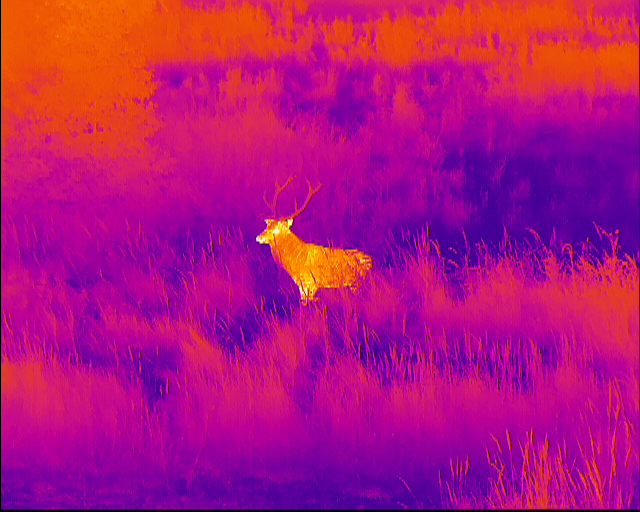
With a thermal imaging camera, the infrared part of the electromagnetic spectrum is actually being looked at. The infrared spectrum consists of the Short Wave Infra Red (SWIR) that runs from 0.5 to 2.5 micrometers (μm). The Medium Wave Infra Red (MWIR) from 3 to 5 μm and the Long Wave Infra Red (LWIR) from 7.5 to 14 μm. The LWIR (also called long-wave infrared) is particularly interesting for hunters as it concerns the thermal radiation as emitted by mammals. We do not see the heat that different sources such as animals radiate with our naked eye. However, the camera can detect these and converts them into an image that is visible/readable to us, as it were. Just as you have to learn to read a language, this is also the case with the image you get on the screen from the thermal imaging camera. Therefore, be sure to practice reading something in the beginning that you can also verify with, for example, your binoculars. In the long run, this will make it much easier for you to read what you actually see on your screen.
Here I would like to take a moment to reflect on the operation of a thermal imaging camera. By doing this, we are going to name some parts that we will zoom in on later. These parts play a crucial role in the characteristics of these devices and the right choice for you.
A thermal imager consists of:
- a lens that captures, bundles and projects heat rays onto
- a sensor (detector) with
- integrated image processor that uses certain software (and the choices for certain algorithms) to convert the image into electrical pulses that are transmitted to
- the screen where an image visible to the human eye is created.
- Finally, there is the housing in which everything is packaged.
1. The lens
The lens is usually made from a semimetal with semiconducting properties, specifically Germanium (GE). This is because Germanium allows the infrared rays to pass through, which is not the case with the ordinary optical glass that we use in our rifle scopes and binoculars. It also shows why you can’t see through glass with a thermal image. Just like with traditional optics, these lenses are also provided with a special coating. The lens must therefore capture the infrared radiation from the objects we are looking at and then let it fall bundled onto the sensor behind it.
Just like with binoculars and rifle scopes, the larger the diameter of the lens and therefore the larger the focal length, the further you can observe, the more you can magnify while maintaining image quality. But that also causes your field of view to become smaller, so that you see less at a shorter distance. The larger the lens, the more expensive the camera. A large lens works well in open field where you want to address at a greater distance, while a smaller lens works well in a dense forest.
FYI: The larger the aperture, the more radiation comes in. It doesn’t get any better than f/1.0, at f/1.5 there is less information available. Then you can have a lot of Netd, the lens limits the performance.
So choose the right lens according to the goal you want to achieve.
2. The thermal imaging sensor/detector/microbolometer
Now let’s dive under the hood and take a look at the engine / heart of the thermal imaging camera, especially the detector. The infrared radiation therefore enters through our lens and ends up on the sensor. The sensor will in turn convert these rays into electronic pulses that then form an understandable image for us on the display.
When discussing the sensor, there are some technical terms and aspects that we need to consider because these will ultimately determine the quality of our image. More specifically, he is concerned with the resolution, the pixel pitch, the frequency and the sensitivity of the sensor.
Resolution:
The resolution of the sensor is expressed as the width and height of the sensor in pixels. The pixels are the sensitive elements that make up the sensor. The more of these elements, the wider the field of view. At a very low resolution, there are too few pixels to achieve a beautiful and detailed image. The image of the smaller sensor is digitally upscaled. The image (The resolution) of a 640 x480 Vox will therefore be better than that of a 240 x 180 Vox. But for the sake of completeness, we have to mention that there are several sensor manufacturers. There are different ways of image editing between sensor manufacturers, and the latter is responsible for 80% of the image quality. So that also plays a role and is not always known for every device. That is why it is best to test what is good for you in your situation.
Pixel pitch:
There is a certain distance between two pixels, the smaller it is, the closer they are to each other and the sharper the image. The smaller the pixel pitch, the more pixels there are within the surface of our sensor and the greater the total resolution. The top viewers today have a pixel pitch of 12 microns, 17 microns is universally accepted. An additional advantage of a smaller pixel pitch is that the binoculars can become more compact and that the power consumption will decrease. This is the most important number when it comes to image sharpness. Together with the focal length of the lens, this determines the DRI. (so not the total number of pixels)
Simply, the smaller the PP, the further you can see.
Frames per second Hz.:
The sensor continuously refreshes the image. The refresh occurs at a certain frequency expressed in Hz (Hz). Our brain/eye recognizes moving images here in a smooth movement from 24/25 Hz. A higher frequency does not provide a better movement experience. Much higher Hz is therefore only a nice marketing argument but otherwise does not contribute much to it.
Sensor sensitivity:
The sensitivity of the sensor or sometimes NETD (which stands for Noise Equivalent Temperature Difference) is also important. We represent these in millikelvin (mK). When registering heat waves, our binoculars register both usable heat waves and noise. The noise makes it more difficult for the sensor to make a sharper imaging. A lower NETD value ensures that there is less noise. A lower NETD will indeed show small heat differences, but the effect is limited.
In birds, for example, they are very well insulated by the feathers. That plays a bigger role. The head of birds, on the other hand, is easier to see due to less insulation. Just as with a Roe Deer, the runners are often clearly visible because of all the bloodstreams that run through it.
When it rains, there is something else at play. There is often so much water coming down and there is often so much moisture in the air that the environment is very quickly reduced (due to the good heat conduction and absorption of water) to almost the same temperature.
In that case, the feather package of, for example, a partridge is cooled even more. Don’t forget that it has less effect on the partridge because it is so well insulated. There is less to cool down on the body so there is not much difference with and without water. Theoretically, the lower NETD should indeed make the minimal extra heat of the feathers more visible, but because there is also a lot of moisture between the camera and the bird, this minimal difference will also be “filtered out”.
3. Integrated image processor
Software Algorithms
It is important to understand that the infrared rays that are captured by the sensor via an integrated image processor that uses certain software converts the image into electrical pulses. These electrical pulses are sent to the screen where we eventually see it as an understandable image. The choice made by each manufacturer will therefore have an effect on the end result as you can read it on the screen. For example, one manufacturer can only focus on the object and less on the background.
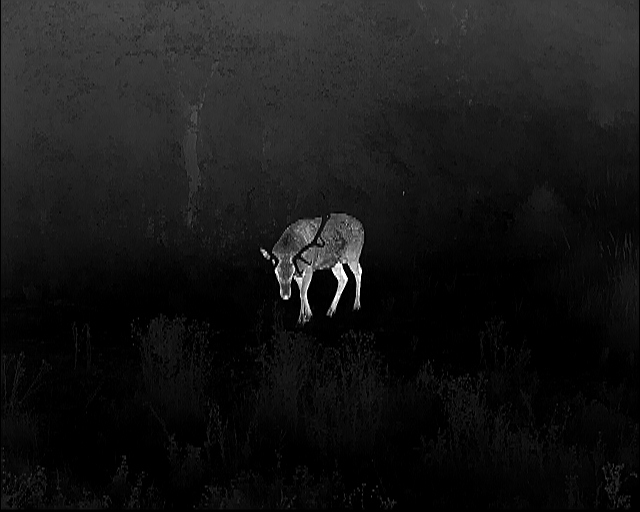
It is therefore important to test different thermal imaging cameras in the same conditions. What I like at Lahoux, for example, is that I can orient myself well on the trees behind my goal. For example, I was able to precisely locate a deer that I didn’t see with the binoculars thanks to the background where a certain tree stood out nicely. By focusing on that specific spot for about twenty seconds afterwards, I was finally able to address the deer. Without Lahoux’s choice to show this clearly as well, I would probably have had trouble finding my deer afterwards with the binoculars. (The roe deer stood on the edge of a forest in a piece of organic grain with many other herbs so that only the head was visible.)
Other manufacturers choose to display the image bright and hard with a lot of contrast. The result is that the animal/heat source will stand out well, but the surroundings are almost impossible to see. This happens because the Algorithm pushes away the midrange (the midtones) in that case.
So here it is specifically necessary to put binoculars with the same technical specifications or even slightly different specifications next to each other to see what you prefer.
4. The display
There are different types. The better the screen, the better the image. The more (and smaller) pixels in the screen the better.
It used to be just Led displays, then (F)lcos was a big step and now the best thing is, the Oled. Images are displayed even sharper and colorfast with Oled.
I would also like to mention that you can set the screen brighter or darker and it is best to set it to the same level when comparing viewers. Otherwise, this could wrongly influence your assessment.
5. The housing
I want to dwell on the housing for a moment. In addition to water and shock resistance, the shape and weight are also important. The housing of course ensures that you can use your camera in all weather conditions (if it is sufficiently waterproof). But it also allows you to carry the camera easily, around your neck or in a jacket pocket. Moreover, an extra tool also means an extra weight. In addition, the operation must be intuitive. That is, you probably still have a gun and binoculars with you and therefore only 1 hand free. Then the camera has to be in a good position and you have to do the most essential functions such as selecting colors, going to standby and zooming very intuitively and easily. A quick function button is then handy. Struggling in the menu does not help when you want to collect information quickly. Moreover, the battery life is also important if you want to sit all night. There you have to consider whether you go for a battery that you can replace or not. You can also compensate for the latter by connecting to a power bank. A replaceable battery must also be quick, easy and, above all, quiet to replace in the dark.
These are all aspects that you should take into account when you want to purchase a thermal image. The last two that you should take into consideration in my opinion are availability and after-sales service. We like to work with Lahoux Optics, for example, because we always get reasonable delivery times at Lahoux. That is, when you are going to order a new device, it will not take months before you have it and therefore certainly no better model has come out at a lower price. This may be the case given that it moves rather quickly with thermal imaging in terms of prices and technology. Finally, it is also nice for the end customer if the support is also there when you have a problem with your thermal imaging camera. Here, Lahoux Optics has the advantage of having a competent repair department in the Netherlands that repairs all problems for the customer in no time.
So here is a hopefully not too difficult introduction that will enable you to answer the necessary questions for yourself when you want to purchase a thermal imaging camera yourself. Even if the technology evolves, this guide will normally help you make the appropriate choice. As at the beginning of our story, I would like to point out again that it is best to test different brands under the same conditions. Only then will you notice what really suits you.
Broad greetings,
Tom


